How to Burn Canon videos to DVD

Dec 30,2019 20:11 pm / Posted by Brian Fisher to DVD Knowledge and Tips
Canon camcorder is one of the best selling camcorders. This camcorder is very suitable to capture life on the edge. If you also like to use it to record details of your own or your family's life, you will have a great number of videos stored on your Canon camcorder. In order to keep these precious memories better or save more storage space to capture more footage in your daily life, you may need to burn Canon videos to DVDs. Or, you'd like to burn DVDs just for sharing or playing more conveniently. Anyhow, to convert videos from Canon camcorder to DVDs, you have to use a smart DVD creator for help.
Wondershare DVD Creator (DVD Creator for Mac ) can be your ideal Canon to DVD burner. This app offers a quick and easy way to create a stunning DVD from your Canon videos. By providing lots of free and cool DVD menu templates and many handy editing tools, you can make a professional-looking DVD in minutes. Below is a detailed guide you can follow it step by step.


1 Transfer your Canon videos to PC
Connect the Canon camcorder to your computer via cable. And the device and the computer all need to be on. After the computer has detected your Canon camcorder, locate the target Canon video files and then copy & paste them to the computer's disk drive.
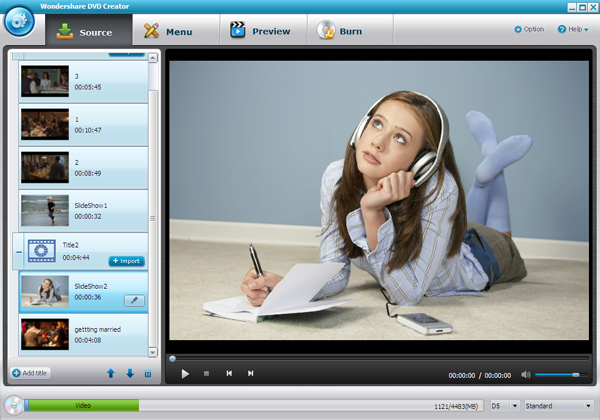
2 Import your Canon videos to this Canon to DVD burner
Run this app, and then go to this app's left pane to click the "Import" button there. Then, you have the chance to browse your computer's disk drive and add Canon videos to this app. Note that a green bar is located at the bottom of the interface to show you the size of the added videos.
Immediately these imported videos are displayed as thumbnails. If you need to adjust the play order, you just click the "↑" or "↓" option at the bottom to rearrange them. Also, you can click the "Add title" button at the bottom-left corner of the main interface to add more titles to organize your videos.
3 Make a DVD menu and edit Canon videos (optional)
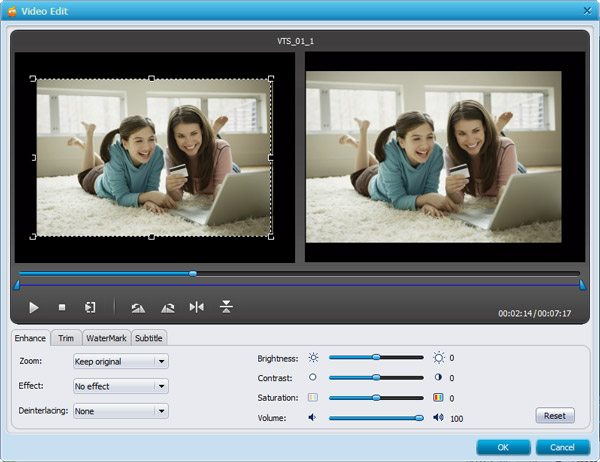
Click the video title you want to edit in this app's pane, and then click the pen icon beside. At once, a editing window will pop up. Here, you can use these practical editing tools like cropping, trimming, rotating, adding subtitle, watermark etc to enhance the video effect.
In order to make your DVD more professional, you can make a DVD menu for your own DVD. Click the Menu tab on the top, move the slider on the right side to choose your favorite DVD menu template to apply. If you don't satisfy any one, just click the green down arrow button to download more free menu templates. Next, you can feel free to customize your own DVD menu by personalizing the thumbnail, text, or adding background music and more.

Preview your project in real time. If there is something you need to change, just go back and re-edit it.
3 Burn Canon videos to DVD
According to the file size shown in the green bar, you can make a decision to insert a blank DVD5 or DVD9 disc to your DVD drive. Then, click the "Burn" tab to tick the "Burn to disc" option there. At last, click the "Burn" button to start Canon videos to DVD burning. And the writen DVD disc will eject automatically after the burning task is done.

Tips: If you don't have a DVD9 disc but your DVD project is larger than 4.7G, just insert a D5 disc, this smart app will automatically compress it for you.
